• Bio
  • Blog
  • Book
  • Contact
Menu

Ryan Erskine

Brand Strategist, Author, Online Reputation Expert
  • Bio
  • Blog
  • Book
  • Contact

An Expert Starter Guide to LinkedIn and Pinterest

January 13, 2016

Do you have a LinkedIn profile?

Chances are it could use some help.

Today, I'm going to show you how to really take advantage of that social network -- how to set up a custom URL, make your profile completely public, and much more.

I'll also show you some neat Pinterest tricks while we're at it.

Want to set up analytics? How about a tool to grow your audience and schedule out pins at the best times?

Let's get right to it...


7 LinkedIn Steps

You probably already optimized your LinkedIn profile back on Day 6 but here are some important things to double-check an go through now:

  1. Create a custom LinkedIn URL using only your name (see below)

  2. Try to get your main keyword (your name) as close to the beginning of your summary section as possible. 

  3. Use your name naturally throughout your summary section a few times.

  4. Fill out your job experience section and write a few sentences about your experience at each position. Remember to write in the third person.

  5. Fill out as many sections as makes sense for you. Consider honors and awards, education, certifications, projects, and publications.

  6. Connect with as many people as you can -- peers, classmates, people from a previous job, etc.

  7. Make sure your profile is set to public to increase chances of ranking (see below)


Creating Your Custom LinkedIn URL

  1. Look toward the bottom of the first box -- the one with your name and photo in it.

  2. Find your LinkedIn URL to the left of “Contact Info”

  3. Hover over it, and click the gear to the right of the URL

Then…

  1. Look toward the top right, where it says “Your Public Profile URL”

  2. Click the pencil to the right of your URL

  3. Type in your main keyword and hit Save


Making Your Profile Public

  1. Look toward the bottom of the first box -- the one with your name and photo in it.

  2. Find your LinkedIn URL to the left of “Contact Info”

  3. Hover over it, and click the gear to the right of the URL

Then...

  1. Find the section under “Your Public Profile URL” that says "Customize Your Public Profile."

  2. Check "make my profile visible to everyone" and check off as many items as you are comfortable with. The more you have public, the more items Google can crawl, and the better your profile will be for ranking purposes.


5 Pinterest Steps

By now, you should already have filled out your Pinterest settings -- custom URL, Bio, Location, and Website. If you haven’t, do that first. Then follow these steps:

  1. Set up Pinterest Analytics (see below).
  2. Verify your URL on the backend (see below).
  3. Create at least 3 boards (see below).
  4. Set up Viralwoot to grow your Pinterest following and reach (see below).
  5. Set up Tailwind and schedule out pins for the week (see below).


1. Setting up Pinterest Analytics

For some reason, Pinterest only allows you to track analytics if you are set up as a business account. Why? Who knows.

  1. Visit the Pinterest for Business page and click Convert now to convert your account

  2. Use your main keyword (i.e. your name) for the Business Name

  3. Pick a business type (Professional, perhaps?) and fill in your website


2. Verifying your URL on the backend

  1. Use this guide to verify your URL if you have a Squarespace website.

  2. Use this guide if you have a Wordpress website.


3. Creating Some Boards

Like Instagram, Pinterest is a fun, visual network. It’s all about getting creative and finding a more whimsical side to your professional brand.

Look at the top categories and brainstorm how your brand can fit in with those categories. Then create at least 3 boards with engaging names, descriptions, and relevant categories.


4. Setting up Viralwoot

Viralwoot is a tool that allows you to quickly grow your Pinterest following and reach. This is especially helpful when starting a new account. Just follow these steps:

  1. Go to viralwoot.com and sign up for free

  2. Log in and connect your Pinterest account

  3. Go to Your Interests (under your name at the top) and fill it out

  4. Go to Account Settings (same place) and change Seeds/New Follower to 10

  5. Click Earn Seeds on the left and click Follow Pinners

  6. Change the Category to something that interests you and follow 10 new users. That’s the limit, so try to follow users that give you the most “seeds.” Seeds are a form of currency, and you’ll want to rack up as much as you can here so you can pay others for following you! See how that works?


5. Setting Up Tailwind & Scheduling Out Pins

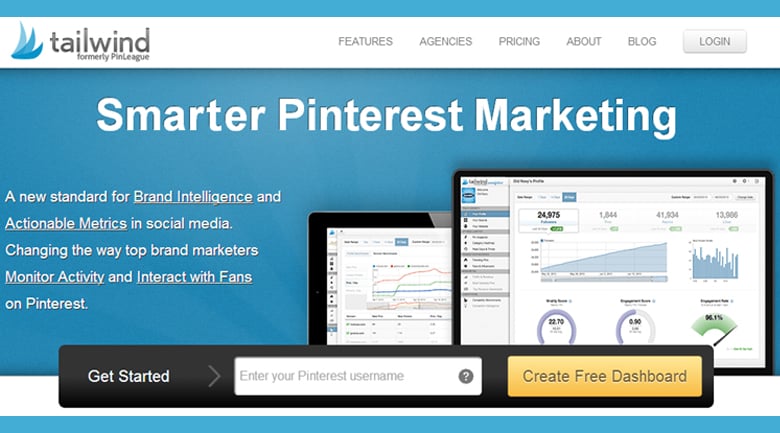
Tailwind is an amazing scheduling tool. It lets you pin at different times throughout the day and night -- especially optimal times -- to give your pins the best chance for engagement. This is key for great search results. You only get 100 free scheduled pins in the trial, but that’s good enough for us during this 28 day challenge.

  1. Go to tailwindapp.com and log in with Pinterest

  2. Google “Tailwind Publisher” and download the Chrome extension

  3. Then open up your Tailwind account, click Publish → Schedule Pins to see how many slots you have in your schedule for the upcoming week. That’s how many pins you’re going to pin right now for your 3 boards.

There is only one rule. Instead of pinning a pin by hitting the Pin it button, you need to schedule it by hitting the Tailwind sail. That’s it -- have fun! You can always check back in Tailwind’s Schedule Pins section to see how many more you need, change time slots, or shuffle your queue.

28 Day Online Reputation Management Challenge

Sign up with your email address and I'll send you each day's challenge directly to your inbox. No fuss, no muss!

Your email address is safe with me. I solemnly swear.

Thank you!

In 28 Day ORM Challenge, Social Media Tags Social Media, Social Profile, 28 Day ORM Challenge
1 Comment

How to Set Up Your Twitter From Scratch (The Right Way)

January 12, 2016

A whole day dedicated to Twitter?

Yes — if we set things up the right way now, we’ll move a lot faster when we want to quickly schedule tweets, find relevant influencers, and grow our following.

If you haven’t registered and optimized your Twitter profile yet, follow the steps from Day 6 first.

Okay let’s begin:


1. Set up Twitter Analytics

Go to analytics.twitter.com. You have to actually visit this page to tell Twitter to start tracking your analytics. Why don’t they do this automatically? Who knows.


2. Set up Buffer & Get the Extension

Buffer is an application we’ll use to schedule out tweets and find the best times to tweet.

Go to buffer.com → Sign in with Twitter to create your account.

(If you’re truly starting from scratch and have 0 followers, you’ll need to sign up via email.)

Connect your LinkedIn or Facebook accounts when prompted. This will allow you to post to those profiles from Buffer as well.

Put in your time zone and let Buffer figure out your optimal times to post. Choose how many times you want to post -- 2 per day is a safe choice for now.

Tracking links is good. Enter your email to finish up.

You should get prompted to add the Buffer extension. Go ahead and do that now.


3. Set up Hootsuite & Get the Hootlet Extension

You can only schedule 10 tweets with the free Buffer account. I’ve never had an issue with this, but if you’re feeling frustrated, you can use Hootsuite’s scheduling system. It’s not as user friendly but it gets the job done.

Go to Hootsuite, and sign in with Twitter.

Also install the Hootlet extension, which will allow you to schedule out retweets.


4. Set up RightRelevance & Add Content Feeds

RightRelevance is one of my favorite resources for aggregating quality content all in one place.

Go to Rightrelevance.com and connect to Twitter using the button up at the top.

After you’ve signed in, you’ll be prompted to enter your email address. Do that and then add a few topics for yourself using the search bar at the top.

I’ll choose personal branding. After clicking “Add Topic,” it shows up in my sidebar. The point here is I can always go back to this sidebar and see what content is trending in each of these topics. It makes it really easy to find share-worthy content and get ideas for your own articles.

Go through and add a few more topics in your niche.


5. Set up Crowdfire

Next go to crowdfire.com and login in with Twitter.

Crowdfire allows you to easily grow your following, clean out followers who are inactive, set up an automatic direct message to new followers, and a whole lot more.

Sign in with your email. Again, uncheck the follow button unless you’re dying to follow them on Twitter.

NOTE: The next screen asks you if you want to routinely brag to your audience about all the new followers and unfollowers you’ve gotten. You don’t, so hit NO.

(If you were going too fast and accidentally hit YES, go to Automate on the sidebar, click the Automatic Tracking along the top, and uncheck the “Tweet my follower and unfollower stats.”)

We’re going to wait until next week to start actually growing your following.


6. Add Tweets to Your Queue

Now let’s add some tweets to the queue.

Go to buffer.com and click on your queue. This is your tweet pipeline. It’s where your tweets will reside until they get sent out at the scheduled time.

Add your latest blog post

Copy the URL to the post, and don’t be alarmed when Buffer shortens it. Then give it a title, add a photo and a hashtag or two. Leave enough characters (20ish) so that people can retweet you without editing your post. Adding an image takes up a lot of characters but the extra engagement from images makes that move totally worth it.

Then add your article a second time. Don’t worry -- you’re not tweeting it out twice in a row. We’re going to fill in that space with other posts.

Try to give it a different title, maybe a quote or alternative title the second time around.

  • e.g. The 28 Day Online #Reputation Management Challenge {URL} #ORM #personalbranding
  • e.g. Want to get your #PersonalBrand in shape? Try the 28 Day Online Reputation Management Challenge {URL} #branding #ORM


7. Finding the right hashtags

Go to RiteTag.com (and sign in with Twitter.)

Type in the hashtag you’re curious about in the search bar. When I try #personalbranding, I see that there are 21 tweets per hour that use that phrase (my competition) and 30,000+ people who see those tweets per hour (my audience). Not bad.

#Branding is much more popular at 400,000+ people per hour. But there are also 217 other people using that hashtag every hour. More competition.

For reference, the blue tags have a longer shelf life because they’re not as popular as green. The green ones are trending -- you can take advantage of that by getting in front of more people but your tweet is likely to get buried in the noise faster as well. Grey hashtags are no good and red tags are overused.

If I have the space, I’d always prefer to use one blue and one green hashtag.


8. Fill in the rest of the queue

Go to RightRelevance and find some articles that fit your brand and add them into your queue using the same strategy. The goal will be to tweet your content and curate other high quality content to turn your Twitter into a content authority in your niche. 


9. Schedule Retweets

Finally, let’s schedule a few retweets.

In Twitter, search a person or a phrase that fits your brand. I like Neil Patel’s work so I found him on Twitter and scrolled down his feed to find one of his latest posts.

When you find the right post, click the little owl to activate the Hootlet extension.

Sign into Twitter. Then choose your Twitter account from the little dropdown menu. Click Post Later and schedule the post whenever you’d like. Perhaps on a day that you’re not tweeting.


Closing Note

And that’s it! Your Twitter is all set up and ready to kick ass.

Now you’ll be able to schedule tweets with ease, retweet your favorite authorities, and grow your following quickly and effectively. Tweet me if you have any questions :)

28 Day Online Reputation Management Challenge

Sign up with your email address and I'll send you each day's challenge directly to your inbox. No fuss, no muss!

Your email address is safe with me. I solemnly swear.

Thank you!


In Social Media, 28 Day ORM Challenge Tags Social Media, Social Profile, Branding, Twitter, 28 Day ORM Challenge
2 Comments

How to Write Your First Blog Post

January 11, 2016

If you don’t already have a list of blog topics and ideas, please go back to Day 7 and put your list together before starting here.


I’m going to keep this one nice and short because, well, you’re the one doing all the writing today.

First, go through your list of blog topics from Day 7 and find one that you’re most excited about. Then, use the following parameters to guide your writing.

And don't forget to have fun!

Here are your assignment parameters (and why):

  • At least 500 words (aim for longer if you can)

    • Why: Quality is the name of the game here. Length is just one consideration of a quality blog post, but it’s still a factor. If you can say everything in 100 words, then you probably didn’t choose an appropriate topic. Plus, all else being equal, longer articles are more likely to be shared on social media than shorter ones. I usually go for 700+ if I can, but again, quality is most important here.

  • An engaging style that matches your brand

    • Why: You may know I’m a fan of conversational content, but this won’t necessarily fit everyone’s brand equally. Consider who you’re trying to reach with your content and write with them in mind.

  • At least one interesting image

    • Why: Content with relevant images gets 94% more views than content without.

  • An engaging headline

    • Why: A failed headline is a failed article. If your headline doesn’t encourage anyone to click it, then nobody sees your article and where’s the fun in that? Spend at LEAST a few minutes drafting up headlines and finding your most engaging one. If you need tips for writing a great headline, read my article, “Don’t Waste Another Headline -- 4 Psychological Tricks To Get You Clicks.”


Tips

  • Need help finding free images? You can always use the Creative Commons filter when searching on Google, or just use this free image resource.

  • Read your work over OUT LOUD as if you’re speaking to your target audience. You’ll be surprised at the things that sounded fine in your mind but sound weird as hell when you say it out loud.

  • Make sure you cite sources when appropriate. All you need to do is hyperlink to the site when you would typically footnote.


Activity Recap

→ Go through your list of blog topics from Day 7 and find one that you’re most excited about.

→ Spend the next 60m researching, writing, and editing your blog post.

→ When you’re done, go post it on your Blog! Remember to embed your image(s) and fill in the SEO information in your plugin.

28 Day Online Reputation Management Challenge

Sign up with your email address and I'll send you each day's challenge directly to your inbox. No fuss, no muss!

Your email address is safe with me. I solemnly swear.

Thank you!


In 28 Day ORM Challenge, Content Marketing, Writing Tags Conversational Content, Content Marketing, Copywriting, Blogging, 28 Day ORM Challenge, Branding
Comment

A Step by Step Guide to Create a Winning Content Strategy

January 10, 2016

Coming up with an effective content strategy is not as complicated as you might think. Once you identify your audience and your message, your topics will flow naturally.

Let’s go through the process step by step:


Identify Your Target Audience/Market

It’s great to think of your target audience as a broad market and then categorize it a bit further. The more specific you get now, the better you’ll be at strategizing engaging ideas and developing content that vibes with your audience.

For example, my broad audience would be

  • People interested in Online Reputation Management and Personal Branding

But if I were to break it down further, I might come up with:

  • Young professionals and entrepreneurs who understand the value of a personal brand but don’t really know what they need to do

  • Recent college grads without a strong career direction who are trying to develop Identity Capital along the way and showcase themselves positively online

  • The Connected Generation -- 18-34 year olds who are active on social media, particularly Twitter

→ Identify your target audience, both broadly and specifically


Develop Your Message

Think about your industry, your target audience, and the types of things that you want to write about generally. If you have a clear sense of these aspects, your message should start to naturally take shape on its own.

Here’s what I came up with:

Managing your online reputation and developing a personal brand are critical because they influence your ability to get a job, get clients, and even get a date. ORM and Personal Branding are not as difficult as many think. I will be as transparent and engaging as possible in an effort to help the Connected Generation learn how to effectively promote themselves online.

→ Develop a rough message for your content


What Are Some Topics You’d Like to Cover?

Now that you know your audience and your message, you might already be thinking of some of the articles you want to write. Write those ideas down! The last thing you want is to have some awesome topics and then forget them in 3 weeks when you’re looking for something to write.


Need some help coming up with effective topics?

  • Write down some trends or innovations in your industry that are making you excited, worried, angry, etc. Look up some news articles and see if there are a couple you’d like to comment on or take in a new direction.

  • Write down some challenges in your industry. This is the birth of the How-to blog post.

    • The idea for this 28 day challenge came about because I wrote down the problem, “people don’t know how to tackle ORM themselves”

  • Think about a personal experience recently that you can write about. Did you just close a particularly challenging deal? If so, what lessons can you teach others about it? Did you just give a great speech somewhere? How did you prepare for it and what advice would you give to others?

An effective tool throughout this process is BuzzSumo. You can look up a topic to see what kinds of content are being shared the most in your industry. You can use that knowledge to inspire your own content and come up with brand new content altogether.


→ Come up with a list of at least 8-10 ideas to fuel you going forward.


Activity Recap

→ Identify your target audience, both broadly and specifically

→ Develop a rough message for your content

→ Come up with a list of at least 8-10 ideas to fuel you going forward.

28 Day Online Reputation Management Challenge

Sign up with your email address and I'll send you each day's challenge directly to your inbox. No fuss, no muss!

Your email address is safe with me. I solemnly swear.

Thank you!


In 28 Day ORM Challenge Tags Content Marketing, Copywriting, 28 Day ORM Challenge, Branding, Online Reputation Management
Comment

Optimize Your Social Media Profiles for Maximum SEO Value

January 9, 2016

If you haven’t built yourself a foundational strategy yet, then go back to Day 1 and do that first.

Assuming you’ve already done that, it’s now time to register your social profiles and fully optimize them to be search engine-friendly. We’re going to set things up properly today so that you can reap the benefits in the months to come.

I already wrote a great post on the 6 Steps to Optimize Any Social Profile for Maximum SEO Value, and I’m going to distill that information here. As a general rule, try to FILL EVERYTHING OUT.

→ Follow the following steps for every social media profile in your link diagram.


1. Reserve Your Custom URL

Search engines look to the URL as a sign of what the online property is all about. If you want my Twitter profile to rank well for my name, it’s wise to have your name in the URL slug.

Protip #1: Don’t get twitter.com/rickross if people know you by Richard Ross.

Protip #2: You may run into trouble getting the exact name you want. That’s okay -- the same thing happened to me. You just have to get creative. Ryan_erskine and erskineryan were also taken and I’m not one to add numbers at the end of my username. I finally decided on ryanerskineNY.


2. Put Your Name in the Title

Ryan Erskine Name in Title Twitter.png

This is self-explanatory. Put your name — or whatever you’re trying to rank for in search results — in the title. Search engines still take title tags seriously and I would be wasting a useful spot for my name if I didn’t put ‘Ryan Erskine’ here.


3. Upload Your Profile Picture

Some social profiles automatically rename your picture -- as Twitter does here -- but it’s worth remembering to always rename your image’s file name as the full keyword.

It’s a good habit to get into because some places will use your file name, and why not give those images the best chance of rising up in your image search results?


4. Input Your Location

Take your public location (from Day 1) and use it consistently across your social profiles.

Yes, there will be overlap when people search your name from different locations, but the city you input will be an important factor for search engines that tailor their results according to geography.


5. Link to a Property In Your Campaign

Ryan Erskine Link Diagram

Refer to your link diagram if you need to remember where things are going. My diagram is super simple -- I’m just going to link everything back to my main website, ryanerskine.com.


6. Write a Unique Bio Using Your Name

Your bio is another prime opportunity for you to use your full name or keyword. You might be able to use your whole bio in a place like Google+, but you’re going to need to have smaller variations for ones like LinkedIn, Twitter, and Instagram.

Branding Note: This is a good point to mention a caveat. You have to pick your battles when working in the world of SEO. Sometimes what’s best for SEO isn’t best for the online branding campaign. In this case, I couldn’t fit my name because it was more important for me to have the association with my company and my author profiles. These 6 steps are all important defaults but they are just that — defaults. Feel free to break the rules when it makes sense for your campaign. 


7. Fill in as Much as You Can

The more sections you fill out in your social profiles the more likely they are to rank for your name in search results. We cannot perfectly control search results, but we can put things heavily in our favor. Flesh out your profiles as much as you can and remember to naturally use your name in the third person.


Activity Recap:

→ Follow the above 7 steps for each social profile in your campaign.

→ Add the username, email, and password for each profile to your excel document.

→ Protip: Make yourself a BrandYourself account. The online tool is a useful way to track your links as they move up and down in search results. The free account will allow you to track 3 web properties and the premium version will allow you to track unlimited links (among other things).

28 Day Online Reputation Management Challenge

Sign up with your email address and I'll send you each day's challenge directly to your inbox. No fuss, no muss!

Your email address is safe with me. I solemnly swear.

Thank you!
In 28 Day ORM Challenge Tags SEO, Social Media, Social Profile, 28 Day ORM Challenge, Online Reputation Management
Comment

Putting the Finishing Touches on Your Website (Tips & Tricks)

January 8, 2016


Now is the time to go through your web pages and find opportunities for improvement. 

Here are a few places to start:


Menu Bar

If you want to add a “Press” page or “Services” page, now is the time to add them. Perhaps you want to add a page with your resume on it or add a link to your CV. What about a media page to showcase some recent rich media? Make sure you’ve checked your SEO plugin for each page and you have everything filled out appropriately.


Sidebar

Take a look at your sidebar. Would viewers benefit from a small reminder on the side of who you are? Or perhaps you’d like to add the RSS Feed from a publication that suits your brand. Try one or two of the following options.

Add Image & Mini Bio

You can add a small image to the sidebar with a mini bio or call to action underneath so that people remember you while they're perusing your site.

If you’re using Wordpress, here’s how you’ll do that:

  1. If you already uploaded your picture, click Media, click on the photo you want to use, and copy the File URL on the side.

    • If not, Go to Media → Add New and add your image first. (Remember to rename the filename before uploading!)

  2. Then Go to Appearance → Widgets and add a Text Box to the sidebar.

  3. In the Text Box, add this HTML code: <img src="File URL" alt="Your Name" style="width:100%;height=228"> and replace File URL with the URL you copied and Your Name with your actual name. (You may need to tinker with the width, depending on your theme.)

  4. Hit Save.

  5. Then add another Text Box underneath, and write something quick about yourself.

    • Example: Hey there! Want to improve your online presence? Contact me here.

  6. Hit Save.

If you’re using Squarespace, here’s how you’ll do that:

  1. Hover over the sidebar and click edit.
  2. Hover to the left of the sidebar until you get that sideways-facing droplet that indicates you can add a block.
  3. Add an image block to add your photo or a text block for text. That's it! 


Showcase Your Recent Blog Posts

This is a great way to keep people on your site longer. If they see a headline that catches their eye, that's a huge win!

Here's how to do that in Wordpress:

  1. Go to Appearance → Widgets and add the Recent Posts widget to the sidebar.
  2. Decide how many posts you want to show, and that's it!

In Squarespace, all you have to do is hover over in the sidebar and add one of the "summary" blocks and choose Blog as the item you want to display.


Add a Publication’s RSS Feed

Consider adding an RSS feed if there is a publication that suits your brand well. It will look like this.

Here's how you do it in Wordpress:

  1. First Google the publication + RSS Feed. Example: “Forbes RSS Feed”

  2. Find the URL of the RSS Feed you want. If I love Forbes Entrepreneurs, I might take that one. (http://www.forbes.com/entrepreneurs/index.xml)

  3. In your site, go to Appearance → Widgets and add an RSS

  4. Enter the URL, give the RSS Feed a Title, and decide how many Entries you want it to show.

  5. Hit Save.

If you’re using Squarespace, just add the social RSS block and follow these steps here.


Add Your Twitter Feed

Embedding your Twitter Feed is another great option because it showcases your latest tweets and viewers may be more inclined to visit you there as well. (If you don’t have a Twitter yet, don’t fret -- you can always revisit this tomorrow after you've built your Social Media Foundation).

If you're using Wordpress, follow these steps:

  1. Go to the Twitter Dropdown Menu on the top right corner and hit Settings

  2. Click Widgets → Create New

  3. Make any changes you’d like -- or keep it as is -- and click Create Widget

  4. Copy the entire generated HTML code

  5. In your site, go to Appearance → Widgets and add a Text Box to the sidebar.

  6. In the Text Box, paste the HTML code

  7. Hit Save.

In Squarespace, this is as easy as double-clicking in the sidebar and adding your Twitter. 

NOTE: It’s generally a good idea to have some links or social icons in your sidebar pointing to your other web properties. I’m intentionally skipping this now. We’ll go through that process tomorrow after we’ve built your entire Social Media Foundation.


Footer

You don’t need a copyright symbol on your website to save your work from copyright infringement -- at least not since the Copyright Act of 1976 -- but it’s still a good idea. Not everyone knows this fact and you don’t want people thinking your material is up for grabs when it’s not.

I’d suggest a simple copyright statement that looks like this:

Copyright © 2015 Ryan Erskine

If your theme allows it, hyperlink your name in the footer to your website. It’s a best practice for SEO and can improve the user experience.

You can add your address, social icons, or anything else down there too! Don't be scared.


Google Analytics

Google Analytics is a great way to keep track of your website’s traffic, pageviews, bounce rate, and other important stats. Once you start tracking, you’ll always be able to look back to track growth over time. 

If you're using Wordpress:

  1. Sign in to Google Analytics and add your website.
  2. Verify your site by copying the code into the Google Analytics section in your All-In-One SEO plugin and you should be good to go.

If you’re using Squarespace, then you’ll benefit from their built-in metrics. But you can also add Google Analytics by following this quick step-by-step guide. 


Images

Are there any other images that you’d like to use on your website? Are there any places where another image would fit well? Images are a great way to break up lengthy paragraphs and liven up those big walls of text.


User Experience

The arm of SEO is long, but it bends toward user experience. You want to ensure that your website is easy to navigate for a random user and that you can access all your pages in just one or two clicks. If you make things difficult for users, search engines will take notice.

See if there are ways you can make the most important pathways easier to access for users. For example:

  1. Could you make it easier for people to contact you?
  2. Can people find your social profiles easily?
  3. Can users learn more about you with a simple click?


Activity Recap

→ Try to add another page or two to your site and add them to your menu bar. Services? Work? Media? Press? Videos? Images?

→ Add one or two items to your sidebar to improve the user experience. You can choose your recent posts, an RSS feed, some social links, your latest tweets, an image, call to action, etc.

→ See if you can add something useful to your footer -- perhaps a copyright statement, links to your social profiles, or something else entirely.

→ Link your website to Google Analytics.

→ Add some more images throughout your site to make it more engaging.

→ See if you can improve the user experience in any way. 

28 Day Online Reputation Management Challenge

Sign up with your email address and I'll send you each day's challenge directly to your inbox. No fuss, no muss!

Your email address is safe with me. I solemnly swear.

Thank you!


In 28 Day ORM Challenge Tags websites, SEO, 28 Day ORM Challenge
Comment
← Newer Posts Older Posts →

Hey there! Want to improve your brand’s presence? Contact me here.

Latest Articles:

Featured
In An Era Of Social Media Distrust, Some Brands Are Finding Ways To Get Intimate
Mar 24, 2019
In An Era Of Social Media Distrust, Some Brands Are Finding Ways To Get Intimate
Mar 24, 2019
Mar 24, 2019
Here's How Major Brands Measure Social Media Impact
Feb 24, 2019
Here's How Major Brands Measure Social Media Impact
Feb 24, 2019
Feb 24, 2019
How To Respond To Negative Reviews (Including Examples)
Jan 18, 2019
How To Respond To Negative Reviews (Including Examples)
Jan 18, 2019
Jan 18, 2019
4 Embarrassing Online Reputation Mistakes Businesses Are Still Making
Dec 25, 2018
4 Embarrassing Online Reputation Mistakes Businesses Are Still Making
Dec 25, 2018
Dec 25, 2018
New Research From 200 Top Brands Shows How Effective Instagram Stories Really Are
Nov 22, 2018
New Research From 200 Top Brands Shows How Effective Instagram Stories Really Are
Nov 22, 2018
Nov 22, 2018

Ryan Erskine | Home